
A bottle lotion pump that freezes mid-press isn’t a small hiccup; it’s lost product, annoyed customers, and brand side-eye.
Fixes can be quick, sure, but the real play is spotting why pumps fail—thick formulas, bad fits, cheap parts—before shelves fill with silent complaints.
Industry reports from Mintel and McKinsey report packaging reliability drives buyer trust across beauty supply chains.
Harmony Notes: Bottle Lotion Pump Quick Guide
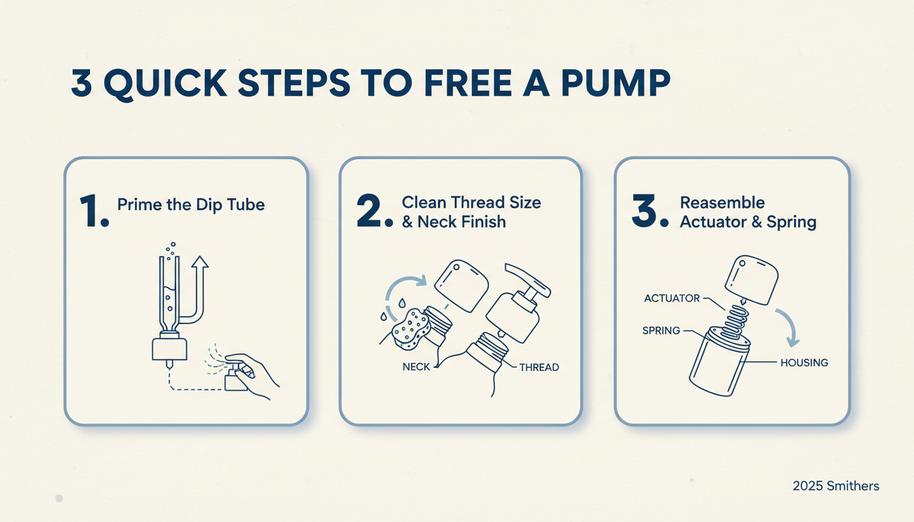
- Inspect Viscosity: Ensure your formula flows—high-viscosity creams need wider actuator channels or PCR pumps.
- Release Vacuum: Slightly loosen airless caps or apply gentle squeeze to HDPE bottles to equalize internal pressure.
- Clean Threads & Nozzle: Wipe PP or PET plastic threads and nozzle openings to remove dried residue and restore seal integrity.
- Re-prime & Reassemble: Pump repeatedly to clear air locks, then realign the spring and piston for consistent dosage output.
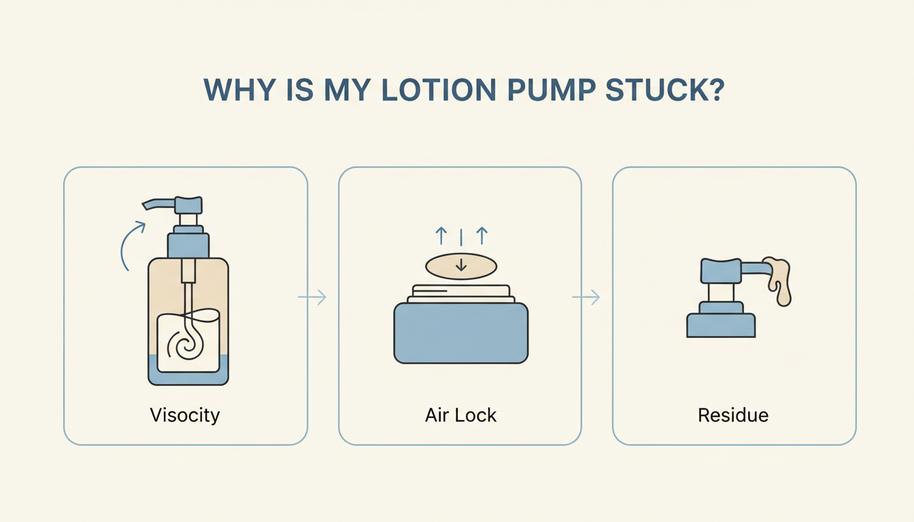
Why Is My Lotion Pump Stuck?
A stubborn bottle lotion pump can feel like it quit on you mid-routine. Most issues come down to flow, pressure, or gunk. Break the problem into how the lotion pump bottle moves product, how air behaves inside, and what builds up over time. Fixing it usually takes seconds once you spot the cause.
Gel Formulation Viscosity Blocking the Actuator
When a thick gel or dense formulation meets a narrow actuator path, the pump mechanism struggles, leading to blockage and weak dispensing. With a thick product, even a new bottle lotion pump can stall.
- Check flow:
- Press slowly → feel resistance
- Prime 3–5 times
- Warm bottle slightly
- What’s happening inside:
- Channel width vs. viscosity
- Too narrow
- Product stalls
- Air slips back
- Slightly wider
- Smooth draw
- Stable output
- Channel width vs. viscosity
Short fixes: dilute a drop (if formula allows), swap to a wider lotion bottle, or go with Topfeelmakeup heads tuned for higher viscosity.
Airless Pump Vacuum Lock in Cosmetic Jars
An airless bottle depends on pressure balance. A vacuum lock forms when trapped air can’t equalize, freezing the dispensing system in a cosmetic jar.
- Signs:
- No product despite full jar
- Button feels springy, no output
- Reset sequence:
- Remove cap
- Tap base lightly
- Re-seat and press steadily
- Inside the mechanism:
- Pressure path
- Intake blocked → piston stalls
- Seal too tight → no return air
- Pressure path
Switching to a reliable cosmetic pump or a quality bottle lotion pump can prevent repeat lockups.
Residue Build-Up on PP Plastic Nozzle Threads
Dried residue forms on PP plastic nozzle threads, causing clogging. Dried lotion hardens, especially around the tip and collar.
- Clean routine:
- Twist off head
- Rinse warm water
- Clear opening with a pin
- Where buildup hides:
- Thread valleys
- Sticky film
- restricts movement
- Nozzle tip
- crust ring
- blocks flow
- Thread valleys
Quick habit: wipe after use. If it keeps happening, upgrade the bottle lotion pump to a design with smoother plastic material paths—Topfeelmakeup options reduce catch points and keep flow easy.
Stubborn Pump? Simple Pressure-Release Hack
A stuck bottle lotion pump can feel like it’s playing games. Don’t toss the lotion bottle pump yet—most issues come down to air pressure, minor clogs, or stiff plastic. Here’s a quick, practical way to get your bottle lotion pump flowing again.
Equalize Air Pressure in an Airless Container
- • Slight twist, not a full removal
- • Listen for a soft hiss
- • Retighten and test the pump mechanism
- Hold the airless container upright
- Loosen the head to equalize air flow and release vacuum
- Prime the lotion bottle with short presses
- ✓ If flow improves, the pressure release worked
- ✓ If not, repeat once and check the pump mechanism
Apply Gentle Squeeze to HDPE Plastic Walls
Short bursts help.
Then pause.
Repeat.
- Step-by-step:
- A) Grip the HDPE plastic bottle walls low on the container body
- B) Apply a gentle squeeze to move product upward
- C) Press the bottle lotion pump twice
- D) Rotate and repeat to use the flexible material evenly
Topfeelmakeup often uses responsive materials approved by the Sustainable Packaging Coalition, so a light touch beats force.
Tap the Dispenser Pump to Dislodge Blockages
- Tap rhythm matters:
-
- Remove cap, expose nozzle
-
- Lightly tap the pump head against your palm
-
- Angle the dispenser pump downward
-
- Press to clear clogs and dislodge buildup in the pump mechanism
-
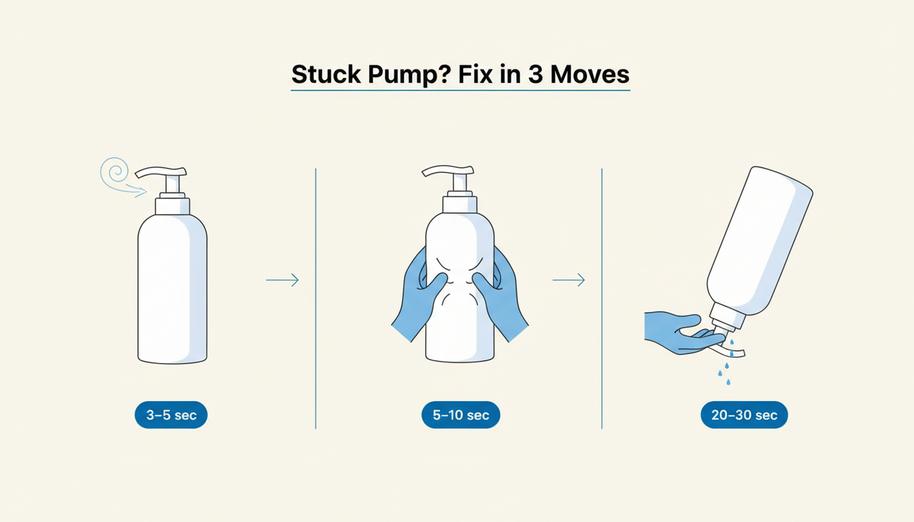
| Action | Force Level | Expected Result | Time (sec) |
|---|---|---|---|
| Loosen head | Low | air pressure equalized | 3–5 |
| Squeeze walls | Low–Med | product rises | 5–10 |
| Tap nozzle | Low | blockages break | 5 |
| Prime pump | Low | steady stream | 6–12 |
| Repeat cycle | Low | full recovery | 20–30 |
If your bottle lotion pump still hesitates, combine all three moves. Topfeelmakeup designs usually recover fast with this routine.
Manual vs. Warm-Water Fix
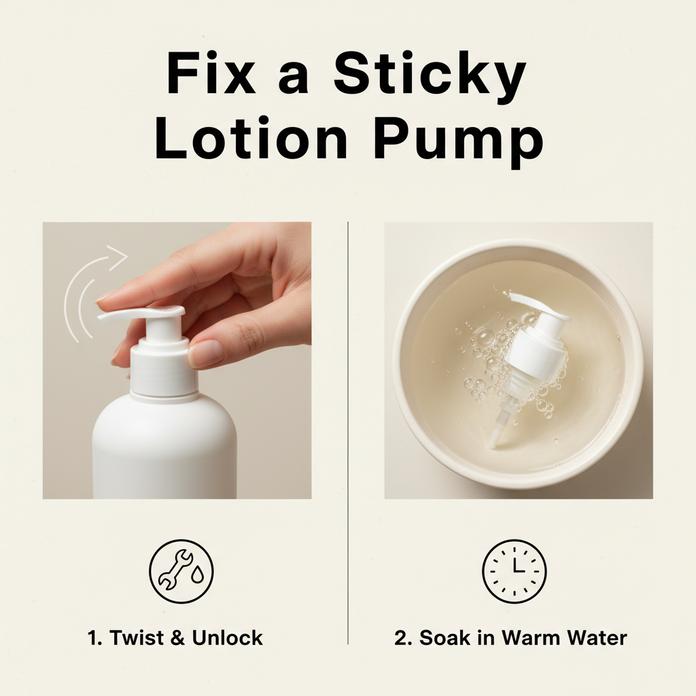
Sticky bottle lotion pump issues feel annoying but fixable fast. This guide walks through hands-on tricks and a soak option, mixing quick moves with deeper resets so your lotion pump bottle flows smooth again.
Manual Release Technique
- Start with the pump head and nozzle
- Grip the collar, then gently twist
- If tight: lightly unscrew a fraction, then retighten
- If loose: reseat and align the threads on the bottle
- Test the plunger
- Press halfway, release, then full press
- Feel for spring tension; uneven bounce means misalignment
- Micro-fix: rotate the pump head a few degrees
- Re-test until the stroke feels even
- Grip the collar, then gently twist
- Quick check loop
- Press → release → listen for air draw
- No click? Re-seat the collar again
Short note: with a bottle lotion pump, tiny twists matter more than force. Topfeelmakeup designs often tolerate micro-adjustments without stripping threads.
Warm-Water Soak Method
- Prep a basin of warm water
- Not hot; you’re dissolving residue, not warping plastic
- Disassemble the dispenser
- Lift off the pump head, keep the dip tube attached
- Soak for minutes
- 5–10 for light clogs, longer for thick lotion buildup
- Swirl occasionally to loosen film
- Pump underwater to flush channels
- 5–10 for light clogs, longer for thick lotion buildup
- Rinse and reset
- Shake out water, air-dry briefly
- Reattach to the bottle and prime
• Signs it worked: smoother press, clean stream
• If not: repeat soak or combine with the manual twist steps
A stubborn bottle lotion pump often clears after one soak; if not, a second cycle plus gentle plunger work usually does it. Topfeelmakeup units handle repeated rinses well, keeping your lotion pump bottle reliable.
Tools, Tips, and Tricks for Pumps
Quick intro: keeping a bottle lotion pump running smooth isn’t rocket science, but tiny details matter. From a stuck lotion bottle pump to a clogged bottle pump dispenser, these practical fixes keep flow steady and extend life.
Precision Tweezers for Clearing Foaming Pump Nozzles
- Prep
- Inspect foaming head → locate blockage in nozzles
- Sanitize tweezers (alcohol wipe)
- Action
- Slide precision tool tips under mesh
- Lift debris slowly; don’t bend springs
- Verify
- Prime the pump; test foam consistency
Small moves, big difference. Works great on a bottle lotion pump used for foaming cleansers or a specialized cosmetic spray bottle, and pairs well with Topfeelmakeup replacement heads.
Thin Wire to Unclog PET Plastic Dip Tubes
Short fixes, real results:
- Use a thin wire to unclog PET plastic dip tubes.
- Twist gently through the blockage, rinse, then reassemble.
- If flow is weak in a lotion pump bottle, repeat once—don’t force it.
Keeps your bottle lotion pump consistent without cracking tubes.
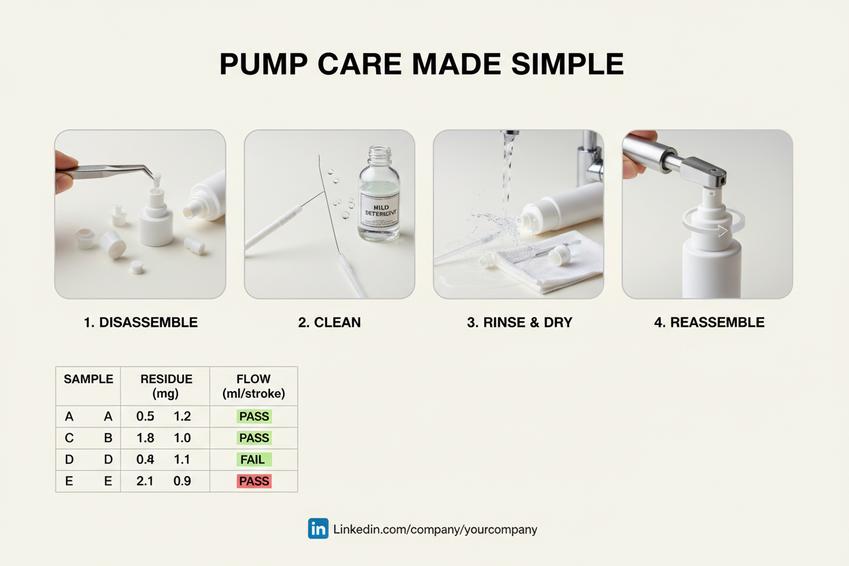
Mild Detergent to Remove UV Coatings
- Clean path
- Mix mild detergent solution
- Soak parts with UV coatings and residue
- Rinse cycle
- Warm water flush → air dry
- Performance check
- Refit, then test spray and dosage
Great for restoring a single wall lotion bottle finish—Topfeelmakeup units respond especially well.
Quick-Release Capper for Fast Actuator Removal
- Secure bottle
- Align capper with collar
- Engage quick-release mechanism
- Lift for fast actuator removal
- Refit without cross-threading
Clean swaps keep any bottle lotion pump or bottle pump dispenser in top shape, minimizing wear and downtime.
Salon Bulk Orders: Prevent Pump Clogs
Running bulk salon orders gets messy when a bottle lotion pump clogs mid-service. This quick guide keeps your lotion pump bottle, pump for lotion bottle, and full bottle lotion pump setup smooth, clean, and drama-free.
Sustainable PCR Plastic Pumps for High Viscosity Lotions
- Selection logic
- Material layer
- Use PCR plastic with stable material composition to support high viscosity flow
- Mechanism layer
- Check pump mechanism spring strength → affects dispensing performance
- Formula match
- Pair with thick lotion formula; test bottle lotion pump output rate
- Material layer
- Quick picks
- recycled material with reinforced housing
- wide dip tube for dense creams
- In practice
- Salons using Topfeelmakeup often report smoother pump for lotion bottle action with fewer stalls when using pcr pp materials or ordering a certified post consumer recycle bottle to align with sustainability goals noted by Plastics Technology.
OEM Supplier Audits to Ensure Thread Consistency
- Audit stack
- Design review
- Validate thread design vs bottle neck spec
- Production check
- Compare manufacturing tolerance across batches
- Assembly fit
- Inspect pump assembly torque on closure fit
- Design review
-
- Request samples 2) Measure threads 3) Cross-fit with your lotion pump bottle
- Topfeelmakeup aligns OEM supplier checks with repeatable supplier evaluation to keep every bottle lotion pump consistent, adhering to engineering guidelines from Cosmetics & Toiletries.
Quality Control Checks on Closure Diameter
- Measurement tree• No wobble • No air gaps • Clean seal
- Tools
- Calipers for closure diameter and bottle opening
- Specs
- Define tolerance specification for snug fitment
- Inspection
- Routine inspection process on pump head sealing
- Tools
- Small drift here = big clog risk in any bottle lotion pump, which is why industry benchmarks from Beauty Packaging and Market Research Future stress rigorous neck-finish QA.
Pre-Test Emulsion Products for Smooth Dispensing
- Validation flow
- Lab stage
- Run viscosity testing on each emulsion product
- Compatibility
- Match product formulation with pump compatibility
- Performance
- Track flow rate, watch clog prevention, confirm product stability
- Lab stage
Topfeelpack trials show a dialed-in bottle lotion pump keeps salons fast, clean, and consistent. When complex or dual-phase formulas are involved, testing a specialized plastic pump or a dual chamber bottle ensures maximum formula integrity per ASTM International and U.S. FDA cosmetic safety standards.
Post time: Jul-31-2026
